Carney All Seasons Blog: Archive for the ‘Plumbing’ Category

Call Carney for all of your bathroom remodel needs!

Friday, May 11th, 2012

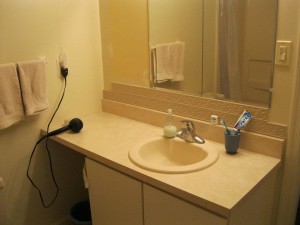
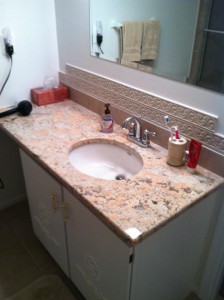
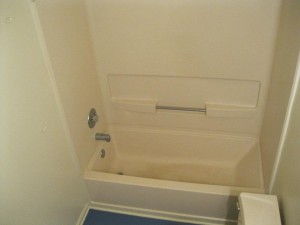
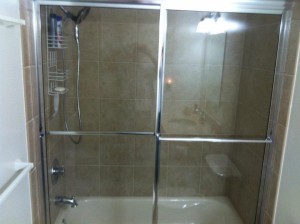
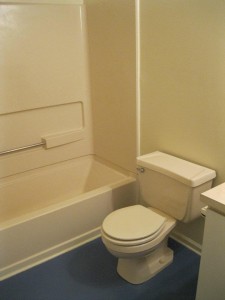
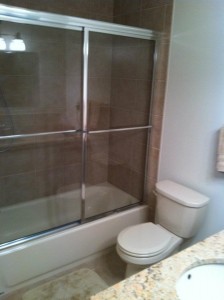
Here at Carney Plumbing, Heating, and Air Conditioning we are experts when it comes to remodeling or adding a new bathroom. We remodeled the existing bathroom below for a customer, check out the before and after pictures!

Remodel | Lansdale | Carney

Before #1

Remodel | Lansdale | Carney

After #1

Remodel | Lansdale | Carney

Before #2

Remodel | Lansdale | Carney

After #2

Remodel | Lansdale | Carney

Before #3

Remodel | Lansdale | Carney

After #3

Continue Reading

Plumbing Basics: Learning the Parts of a Toilet

Monday, May 7th, 2012

The majority of homeowners are not aware that they can repair most minor toilet problems on their own. Whether it’s overflowing or running more than it should, toilets can be repaired often without calling a Willow Grove plumber; however, it is important to know the basic parts of a toilet before trying to troubleshoot toilet issues.

Here’s a guide to learning the parts of a toilet:

Willow Grove Plumbing Tip - Parts of a Toilet

Tank: Pictured above (inspectapedia.com) is the tank on the back of the toilet, which holds the water supply for the bowl and the components that you need to know to fix most problems.

Bowl: Holds wastewater and uses the water from the tank to flush the waste.

Flush Handle:  The flush handle is the part that everyone knows, but it’s important to know what happens when you flush: the flush handle is connected to the trip lever, which lifts the flapper and allows the water for the tank to enter the bowl.

Trip Lever: The trip lever is the part that you need to know for a running toilet. It attaches the flush handle to the flapper, and when you flush the toilet, this lever lifts the flapper (sometimes called a flapper valve) and releases the water from the tank into the bowl to force the wastewater in the bowl down the sewer drain. When a toilet is running, you can simply lift the trip lever to lower the water level in the tank.

Float Ball: The float ball basically measures the water in the tank. After you flush, the ball will fall as the water level lowers, and the ball will rise again as the tank fills from the toilet main water supply. When the tank has enough water, the toilet will stop running.

Overflow Tube: This is the tube that will stop the tank from overflowing if the toilet is running. It leads into the drain and pushes out all the excess water. Sometimes you can remove the rubber water supply tube from the overflow tube to keep a toilet from overflowing if you are not able to shut off the main water valve behind the toilet.

Flapper Valve: This is the part to know whenever you have an overflowing toilet or a backup. The flapper is attached to the flush handle by a chain and the trip lever. Whenever the flapper is pushed down, the water cannot leave the tank, so when you flush, it creates a suction to pressurize the water entering the bowl so that it has enough force to flush the waste. If your toilet is overflowing, push the flapper down with your hand so that it stops the water from entering the bowl. Most people are afraid to put their hands in the tank because they associate the tank water with the water in the bowl. The water in the toilet tank is clean because it comes from the main water supply line, which is attached to the stop valve.

Stop Valve: This is also called the toilet supply valve because it controls the fresh water supply going into the tank. It is usually located behind the toilet near the floor, and turning it off is another way to stop an overflowing toilet because the tank cannot fill once it is turned off.  It is attached to the supply tube, which attaches to the refill tube.

Supply Tube: Although the supply tube and refill tube are connected, they are two different parts. People often use their names interchangeable, but what’s most important to know is that the supply tube supplies the water from the main line and into the refill tube, which refills the bowl.

Refill Tube: When the float ball is down, the refill tube fills the bowl with the water from the supply tube. After a flush, the ball rises, and when it reaches a certain level, the refill tube stops the flow of water into the bowl.

Trap: The trap is a seal that prevents backflow and strong odors from the main sewage line. If you smell sewage in your bathroom, particularly near the toilet, you could have a bad seal or faulty trap. Troubleshooting a trap usually requires a plumber, unless you are familiar with toilet installation.

Wax Ring: Another cause for bad odors is the wax ring, which is a seal between the toilet and the sewage line. A faulty wax ring could also cause leaking at the bottom of the toilet. Call a plumber whenever you aren’t sure about leaking toilets or strong sewer odors; there could be a problem in the main sewer line.

Call Carney Plumbing Heating & Cooling if you have any questions about these components, or if you want to trouble shoot with one of our Willow Grove plumbers.

Continue Reading

Fix Water Leaks Before They Cause Major Damage

Monday, April 30th, 2012

Water leaks are one of the most destructive and frustrating problems in many Lansdale homes. Undetected water leaks can rot wood, destroy drywall, and cause mold to grow in unseen spaces of your home. Spending the time and money to find and fix water leaks before they cause significant damage is one of the most cost-effective actions a homeowner can take.

Sinks

Cabinets beneath kitchen and bathroom sinks are a good place to start. Look for signs of water damage or build up. Mold and mildew are telltale signs of water leaks. Touch the pipes, particularly the areas where they enter the faucet. Run the hot and cold water faucets for a few minutes and repeat the inspection. Finally, fill the sink with water, let it stand a few minutes and open the drain. Now check the drain pipe and the joints that connect it to the sink for leaks.

Dishwashers

Dishwashers can’t easily be checked for leaks without pulling them out from beneath the counter. But you can inspect the water lines that connect the dishwasher to the kitchen sink. For some units, you may be able to shine a flashlight beneath the dishwasher to look for puddles.

Toilets

Toilets can leak from the water supply pipes filling the tank and from the seal between the toilet and the waste pipe in the floor. Flush the toilet several times and carefully look for any signs of leaks in the  joints of the water supply pipe and the floor around the base of the toilet. Lift the lid off the tank and flush the toilet. When the tank refills, the water should completely shut off. If the flush valve or water control unit is old, corroded, or loose, the water will continue to run. Running water cools the water delivery pipe to the toilet and the tank, which will cause them to collect condensation in humid weather. The condensation will drip and eventually cause water damage to the floor behind the toilet. Bottom line – don’t ignore a running toilet. Have the water control and flush valve fixed or replaced.

 Tubs and Showers

Inspect the caulking around the tub or shower. Old, cracked, or missing caulking can allow water to leak into the wall. Water dripping from a leaky faucet or shower head will go down the drain and not cause any damage, but the faucet may also be leaking water behind the tub or shower.

Hot Water Heaters

Finally, inspect the hot water heater for leaks, and the boiler if the house has hot water heating. The first place to look is the floor around the appliance, but also look at the joints where the water pipes connect.

If you need any help with leak detection or any other problems with your Lansdale plumbing, give Carney Plumbing Heating & Cooling a call!

Continue Reading

How and Why to Recaulk Plumbing Fixtures

Wednesday, March 21st, 2012

You probably don’t pay much attention to the caulking around your New Hope plumbing. It is one of those things that is always there, working kind of behind the scenes, that you never seem to notice until something goes wrong.

The think about caulking, though, is that something can go wrong with it rather quickly. Because of the high frequency of use of tubs and sinks, the caulk that seals the space between the fixture and the wall can deteriorate and crack over time. This can cause gaps in the caulk or cause the fixture to come loose from the wall.

When this cracking and erosion happens, water from your bath, shower head or faucet can seep in between the fixture and the wall, potentially causing water damage and fostering colonies of mildew and mold.

Cracked caulk is inevitable with daily use, so you don’t need to worry about preventing it. Instead, learn how to properly fix the situation with a fresh caulk job:

  1. Scrape away all the old caulk from around the fixture using a utility knife or putty knife. Take care to remove all the old caulk while also avoiding scratching porcelain fixtures.
  1. With all the caulk gone, clean out the joint thoroughly. This will remove any last traces of caulk, as well as any other dirt or buildup. If you notice mildew or mold, use a chlorine bleach solution to clean the joint before recaulking.
  1. Once the joint is dry, recaulk it using a bead of caulk that is just slightly wider than the joint. This ensures an adequate seal. Wipe any excess away with a rag.
  1. Allow the caulk to dry thoroughly before using the sink or tub. Read the instructions on the caulk for an estimated drying time.

Take note that it is very important to thoroughly remove all the old caulk and clean everywhere along the fixture joint before applying the new caulk. Otherwise, the new caulk will not adhere properly and potentially damaging dirt may get sealed into the joint.

If you followed all the steps carefully, you should have a fresh seal of caulk that will last you another several years! If you need any help with your plumbing fixtures, give Carney Plumbing Heating & Cooling a call today!

Continue Reading

Bucks County Plumbing, Heating or Air Conditioning Repairs – $40 off!

Friday, February 10th, 2012

Repairs to your plumbing, heating, and air conditioning system are never something that any homeowner looks forwards to. Plumbing problems can cause a lot of damage, and problems with your heating can make your home very uncomfortable until they are fixed. When you need a repair, you want to make sure that you have a contractor that you trust. You want fast, reliable service – 24 hours a day, seven days a week. At Carney, we only provide the highest level of customer service and workmanship. When you hire a Carney technician, you know that you are getting one of the best in the business. And because we know that this time of year is a bad one to need any type of repair, we are offering a special deal: $40 off any plumbing, heating or air conditioning repair!* Whatever your problem, Carney PHC is ready to help!

*Cannot be combined with other offers.

Continue Reading

Why Do I Need Water Filtration?

Monday, December 26th, 2011

Like most Langhorne homeowners, you’re probably asking yourself why you need water filtration – what exactly happens to your water that makes it necessary to install an entire new system in your home to keep it clean? There are a few things that might be an issue here and your specific circumstances will determine which affects you the most.

Common Water Contaminants

While most homes don’t suffer from all of the following, there is a good chance you will have at least some of these contaminants in your home:

  • Sediment
  • Bacteria
  • Chlorine
  • Copper
  • Fluoride
  • Iron
  • Manganese
  • Nitrate
  • Sulfate
  • Viruses

This is only a partial list too – there are a number of other, more exotic substances that might be in your water. Now, this doesn’t mean your water suffers from all or even most of these problems. Many homes only have one or two contaminants and they may not even be immediately dangerous to your health.

But, here’s the issue – and the number one reason that most homes should have a water filtration system. Things change. While your home may not suffer from virus or sulfate infiltration now, it could later. Things happen to the water supply – pipes get old, things get into the water tables and chemical levels change at treatment plants.

The only way to combat these problems is to have a good water filtration system already in place. Specifically, a reverse osmosis system that can remove all of these contaminants through an advanced chemical process.

Testing Comes First

To make sure you have the right system in place to tackle your water contamination problems, make sure you first contact someone to perform full water testing on your home’s drinking water. Because some of these contaminants must be treated with chemical infusions through pumps or special cartridges, it is important to know in advance what you’re up against.

Continue Reading

Plumber Tip: How to Replace a Bathroom Vanity

Monday, December 12th, 2011

Because it looks something like a dresser combined with a kitchen counter, you may think of your Jamison home’s bathroom vanity as being a piece of furniture, and therefore that it is simple to replace. Well, there’s good news and bad news there.

The bad news is that because of the sinks and pipes involved, your vanity is part of your plumbing system, so it’s a little trickier than getting a new sofa.

The good news is that it is still something you can do on your own – or at least with a friend – in a few hours or so. After you have measured the space and purchased the new vanity, here is how you can go about replacing the old one:

  1. Shut off the water supply. This is always the first step when undertaking any sort of plumbing work. Put a bucket beneath the sink to catch any water that drips from the supply lines after you disconnect them.
  2. Using a putty or utility knife, loosen the caulk that is sealing the countertop. Gently remove the countertop.
  3. Detach the vanity from the wall. Most vanity units are screwed in place to the wall, so just spot and remove all the screws.
  4. Mark the studs in preparation for positioning the new vanity. Hint: the old one was already drilled into the studs, if it was done properly.
  5. Put the new vanity in place, making sure it is flush to the wall.
  6. Attach the new vanity to the wall, taking care to screw into the wall studs that you marked in step #4.
  7. Put a bead of caulk along the top of the vanity base to hold the countertop in place. Carefully set in the new countertop.
  8. Reconnect the plumbing that you disconnected as part of step #1.
  9. Put down a thin bead of caulk along the edges of the countertop below the lip. Smooth the caulk in place with a damp rag.

Now your new vanity is all set. Allow the caulk to dry before getting moisture near it, and don’t forget to turn the water supply back on! And if you need any help, talk to your local plumber.

Continue Reading

Signs that You Have Hard Water in Your Plumbing

Friday, December 9th, 2011

Hard water is fairly common, even in a place like Blue Bell. It is called hard water because of the minerals in it, such as calcium, iron and lime. Depending on how “hard” the water is, it’s usually perfectly healthy, but can cause some other problems throughout the home.

Hard water can negatively affect the durability of household appliances like dishwashers and washing machines, as well as pipes and fixtures throughout the home. How do you know if you have hard water? Here are some common signs and symptoms to be on the lookout for:

  1. A white, scaly, filmy residue left behind on plumbing fixtures. In particular, you may notice these on showerheads, on stainless fixtures like the basin of your kitchen sink, on your silverware or in the coffee pot.
  2. Clothes that are not getting as clean as they should in the laundry. This is because hard water is less effective at washing away dirt. Likewise, you may notice soap scum residue in your tub or shower.
  3. Little or no lather from shampoo or soap while showering.
  4. A reddish tinge to hair over time. This is due to iron in the water that can temporarily change hair color in the shower.
  5. Water takes a long time to heat, or heating costs that are higher than usual. This is because hard water requires more heat than water with fewer minerals in it.
  6. A foul odor emanating from your water.

If you notice any of these signs, or a combination of them, you may have hard water. There are certain things you can do to control the effects of hard water, such as using a commercial mineral remover to dissolve deposits left on showerheads and other fixtures. Vinegar also works well.

However, the best thing to do is to treat hard water so that it does not damage your plumbing system. A licensed plumber can help you do this by adding water softener to your water supply, among other treatments. These are things that need to be done on an ongoing basis, but will help extend the life of your expensive appliances and plumbing system.

Continue Reading

Common Water Line Problems

Monday, November 7th, 2011

Everyone needs water in Abington. It keeps us clean, provides us with a clean drinking source and helps us cook food and wash clothes. So, when a problem occurs with the water line, it can be disruptive to every aspect of everyday life. Here are some common water line problems and solutions you can implement to solve them as fast as possible:

  • Burst Pipe – The biggest problem you can have is a burst pipe. This is a major problem and one that needs to be solved immediately. If your pipe bursts or starts to leak, turn off the main water supply immediately and call an emergency plumber. You’ll want to have it patched as soon as possible to return normal water service to your home.
  • Noisy Pipes – Noise in the pipes is a slightly less disastrous problem but it can lead to bigger problems down the road if not dealt with. Usually, it is due to air in the pipes which can create a loud banging sound. If your pipes are vibrating or banging, the easiest solution is to turn off the water supply and drain your pipes completely, then fill them back up to remove the air build up.
  • Water Pressure – Low water pressure can be due to a number of problems, from a small leak somewhere to an issue in the incoming water supply. If you notice water pressure dropping in your home, call a professional to inspect the problem and offer potential solutions.
  • Sediment in the Pipes – If suddenly you are seeing excess sediment, rust, or other debris in your water it is probably from an aging pipe. While this doesn’t necessarily signal that your pipe is about to burst, it can be a sign of potential problems in the future. Build up from hard water or erosion can both be major problems if not fixed right away.

Water line problems can range from small nuisances to major disasters that threaten your entire home, but they should all be treated with equal import. If something happens to your water line, don’t waste time trying to track down a solution. Turn off the water supply and call a professional right away.

Continue Reading

How to Install a Toilet: A Guide From Ambler

Friday, October 7th, 2011

A toilet is a relatively basic piece of plumbing equipment, but that does not mean that installing it in your Ambler house is easy. This is certainly a job that many people can do on their own, but you should be prepared to devoting the majority of your day to the project. While the installation itself is not terribly complicated, it is quite important that you get it right, so make sure you have all of the necessary materials, equipment and tools before you begin.

The first thing to remember is that you need to install your toilet in an appropriate place relative to the rest of your bathroom plumbing. Especially if you are installing your toilet along a branch drain, make sure that the sink, shower and any other plumbing fixtures are upstream of the spot where you will be installing the toilet.

You will also need to make sure that you install the toilet an appropriate distance from the wall. You need to be able to get around the toilet, and you also want to leave space so that work can be performed on the unit later. Putting your toilet too close to the wall can cause all kinds of complications in the way the unit functions and there is also a possibility of condensation build-up. For all of these reasons, it is important to make sure you are allowing an adequate amount of space on all sides.

The procedure you will have to follow when installing a toilet will be slightly different depending on whether you are installing it in a new spot or simply replacing an existing unit. When replacing an old toilet, you need to remove everything involved in the previous installation. That means taking the old bolts out of the floor and scraping away any residue to ensure that you have a clean and even surface to begin your installation on.

You should also make sure that you are aware of all applicable local codes before you begin your work. Even if you technically install your toilet correctly, you could run into trouble later on if your installation is not actually up to code. It is also important to remember to level all of your fixtures before you complete the installation process and to make sure you use a dielectric or brass fitting when attaching galvanized steel and copper to each other.

Continue Reading