Carney All Seasons Blog: Posts Tagged ‘Plumbing’

Holiday Emergencies: How to Unclog Your Toilet…Without Your Guests Even Noticing

Wednesday, December 29th, 2010

It’s your big holiday party. The carols are playing, the champagne is sparkling, and everyone’s having a great time. But when you step into the bathroom to wash your hands, you discover that one of your wonderful in-laws has attempted to flush the equivalent of a small forest down your toilet. You have a houseful of people and you need to unclog your toilet now. What can you do?

To really handle this situation well, you should stock up on the right tools ahead of time. Along with the veggie dip and spiced wine, add the following to your holiday shopping list: a flange or ball plunger, and a toilet auger (also known as a closet auger). You should be able to get both in your local hardware store.

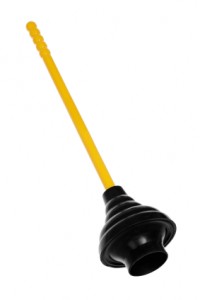
But wait! you say. I already have a plunger! You probably do, but it may be the wrong kind. The standard “cup plunger” (which is what most people have on hand) looks like a rubber ball cut in half. Contrary to what most people think, these plungers aren’t for toilets – they are for the tub, where the flat edge of the plunger will connect well with the flat bottom of the tub to form a vacuum seal. The right tool for unclogging your toilet is a flange plunger or a ball plunger. These are properly shaped to connect to the curved shape of a toilet bowl and maintain a good vacuum seal while you plunge.

So…back to the party and your emergency. Assuming that you’ve prepared appropriately, you will probably be able to clear that clog quite easily – and if you’re discreet, your party guests will never need to know! The most important thing is to overcome the temptation to flush an already blocked-up toilet (we know, maybe you’ll get lucky, but more likely, you’ll end up overflowing the bowl and making a really disgusting mess and having to clean it up with the guest towels). Instead, start by plunging with your handy-dandy new flange plunger. Gently push the plunger head through the water, allowing the air to escape from it. Then, fit the plunger around the hole in the bottom of the bowl, and push the handle up and down rapidly until you feel the clog release or until the water level in the toilet drops.

Now, test to see if the toilet really is draining. Once again, it’s tempting to flush – but don’t do it. Instead, pour a little water down the toilet from a bucket, or lift the tank cover and slowly lift the flapper seal at the bottom to allow a little water to enter the bowl. (Don’t lift the flapper all the way, or the toilet will flush, and you might end up wading around in something you’d rather not think about.)

If the added water leaves the toilet easily, then the clog is cleared. If not, plunge again.

If the clog won’t clear after repeated plunging, break out the heavy firepower in your freshly-stocked plumbing arsenal. Your new toilet auger has an auger bit (a sharp spiral of wire) at the end that is connected to semi-rigid wire or cable that flexes to thread through the bends in a toilet bowl. The auger bit and the wire are connected in turn to a long handle with a hand crank that you can turn to work your way through the clog.

Start by turning off the water supply to your toilet, to keep any possible mess to a minimum. Then, fully retract the auger cable into the handle and put the auger into the toilet so that the curved bit where the cable comes out of the handle faces the same way the toilet drains. (Some toilets drain to the front and others to the rear – look into the toilet bowl to see which way yours goes.)  Work the cable into the drain with a combination of cranking and gentle pressure until it becomes tight and stops turning, or until you feel resistance. Either one probably means that you’ve hit the clog. Crank the auger quickly to break up the clog, and if you can’t crank any more, stop and start cranking in the reverse direction. Continue doing this until you’ve inserted the auger all the way. If you feel that the auger has grabbed something and is stuck, push and pull gently or crank back and forth while gently pulling up. Never force the auger or you may break the toilet porcelain.

After breaking up the clog, use the plunger again to move the obstruction down the drain line. Then, check to make sure the toilet is draining (remember – do this by adding a small amount of water from a bucket or by lifting the flapper slightly, not by flushing!). If and only if the toilet seems to be draining well, try flushing it. If it flushes, you’ve defeated the clog, and you can turn the water supply to your toilet back on.

Then, don’t forget to clean the auger! Put it in a garbage bag to prevent drips and carry it out of the house. (Okay, you don’t have to do this during your holiday party, but please don’t forget to do it later!) Clean it outside and then bring it to a warm dry place to dry. Spray the auger cable with WD-40 to remove any remaining moisture and protect it while in storage. Don’t store the auger lying down – hang it, handle side up, from a hook in your workshop or shed.

Toilet augers have a reach of about three feet. If your clog doesn’t clear after you’ve tried the auger, it probably means that the obstruction is farther down the drain line. However, don’t try using a drain snake to clear the blockage, because it can damage your toilet.

Instead, call us at Carney: 215-346-7160. Even over the holidays, we’re available 24/7 to help you cope with emergencies. We’ll be glad to fix the problem and get you back to your party.

Continue Reading

Dual-Flush Toilets: Another Great Green Plumbing Innovation

Wednesday, December 15th, 2010

If you’ve traveled to Europe or Australia, you’ve probably seen toilets with two buttons instead of a single flush handle. Pressing one button flushes the toilet lightly to remove liquid waste, and pressing the other produces a higher-volume flush to remove solid waste.

Originally designed for drought-prone Australia, these water-saving toilets are becoming increasingly popular in North America as well.

Standard 1.6-gallon toilets are a great improvement over older toilets, which used 3 or even more gallons per flush. But dual-flush toilets are even more water-efficient. A “full flush” uses 1.53 gallons per flush, and a “half flush” uses only 1.02 gallons per flush. The result is a reduction of up to 68% in water usage over a conventional toilet (and even more if your conventional toilet is old and leaky).

Of course the savings vary from person to person, but if you use the toilet an average of 5 times a day, you’ll save close to 600 gallons of water every year. For a family of four, that works out to a total savings of 2400 gallons annually. And, since toilet usage typically accounts for roughly a quarter of your water bill, you can end up with a monthly savings of close to 17%.

Another benefit of dual-flush toilets is that most models have a larger trapway for removing waste than conventional toilets – which reduces the likelihood of a clog.

Finally, dual-flush toilets look great. They are sleek, modern, and European-looking, and they perfectly complement a high-end bathroom.

Continue Reading

Plumbing Is Going Green! Start with Simple Upgrades to Your Faucets and Showerheads

Wednesday, December 1st, 2010

When people talk about “green building”, they’re typically referring to energy-efficient heating and cooling appliances, insulated walls and windows, and sustainable materials. But these days “green plumbing” is getting increasing attention – and rightly so, because water consumption is a major factor in the environmental footprint of any building! The green plumbing movement is being led by drought-prone Australia, where it’s even possible for plumbers to earn a Green Plumbing Certification.

“Green plumbing” helps the environment by doing one or more of the following:

  • Saving water
  • Saving energy
  • Using environmentally-friendly materials

In the US, LEED Certification is becoming increasingly popular, which means that green plumbing systems are being installed in many new or substantially renovated buildings. But green plumbing improvements don’t have to be big and expensive. In fact, they start at under $20.

Over the course of the next few blog posts, we’ll look at a range of green plumbing upgrades – some that you can do yourself, and others that require professional assistance.

In this first post of our “Green Plumbing” series, we’ll look at the simplest and most affordable green plumbing upgrade you can make: installing low-flow faucet accessories and showerheads.

How do low-flow showerheads and faucet accessories work?

Low-flow showerheads and faucet accessories (often referred to as aerators, which is the most popular type) attach to existing fixtures. Normal-flow showerheads use about six to seven gallons per minute (GPM), and the water comes out at about 80 psi (lbs per square inch, a measure of pressure). Of course, if you try to use less water with a normal showerhead, the stream is flat and insubstantial – a very unsatisfactory shower experience. Low-flow showerheads solve this problem by forcing the water into a narrower opening, which reduces the amount of water that comes out, but maintains the pressure at 80 psi for a nice strong stream. (It’s like partially blocking the end of a hose with your thumb to increase the force of the water coming out – except that low-flow faucets and showerheads reduce the size of the stream only a little, just enough to maintain existing pressure with less water.)

Low-flow faucet accessories work the same way.

There are two different kinds of low-flow faucets and showerheads:

  • Aerating faucet accessories and showerheads mix air into the water stream for steady pressure. The steady stream sensation is very popular with consumers. However, mixing air into the water can lead to a reduction in water temperature, which can be a drawback for showers during the winter months.
  • Non-aerating faucet accessories and showerheads don’t mix air into the water, which results in a pulse-like rather than a steady-state stream. Not everyone likes the pulse effect, but those who do say it feels like a gentle massage. Non-aerating faucet accessories and showerheads maintain water temperature very well.

How can you tell if you need a low-flow faucet or showerhead?

The EPA standard for new residential lavatory (bathroom) faucets is 1.5 GPM (gallons per minute). Your current faucet may have an aerator on it already, and if it does, it will have the GPM stamped on the side. If the GPM of your existing aerator is greater than 1.5, you should upgrade to a new high-efficiency faucet aerator. If you don’t have an aerator, check to see if the inside of your faucet has threads (grooves) for an aerator to be screwed into it. If it does, install an aerator.

If you already have a low-flow showerhead, check the side of the showerhead to see if it has a flow rate of 2.0 GPM (the new EPA standard for showers). If you don’t already have a low-flow showerhead, you can test your shower to see if its flow rate is too high. Put a two-quart saucepan on the floor of the shower and position it in the middle of the shower stream. Turn the shower on at full pressure and count how many seconds it takes to fill the pan. If it takes fewer than 15 seconds, you would probably benefit from a high-efficiency showerhead.

How much water will a high-efficiency faucet or showerhead save?

It depends on how much water your sink or shower used before you installed the upgrade. The only way to know for sure is to check your utility bills over the next few months and compare them to the same time period during the previous year. If you want to feel good about your decision right away, you can get a rough estimate as follows: assume that your current showerhead uses 2.5 GPM (this is a very common flow rate for modern showerheads). A new 1.5 GPM showerhead will make your shower 40% more efficient. Use your utility bill to calculate 20% of your total water usage (this is the amount typically used for showering), then take 40% of that number. Multiply this by your cost-per-gallon, and you’ll have your savings!

How do I find high-efficiency faucet accessories and showerheads?

When you go to your local plumbing supply store, look for the EPA WaterSense label. This is the equivalent of the EnergyStar label, and all products bearing this label meet the new EPA water use guidelines.

Continue Reading

We’re Grateful for Central Heating and Indoor Plumbing

Thursday, November 25th, 2010

The holiday season is upon us again – a time for celebrating with family and friends, and remembering our many blessings.

Of course, the most important of these are the love of our family and friends and the food that nourishes us. We hope these blessings are shared by all our customers.Baby Sleeping By Fire in a Comfortable Home With Central Heating

As the weather gets colder, we are grateful, too, for the comfort of our homes. It’s worth remembering that even the simplest of our modern homes are full of luxuries that people of centuries past could not even have imagined.

Take central heating, for example, which did not become widespread until the 20th century (although it was actually invented by the Romans). Here in the New World, early European settlers emulated the practices of the Native Americans, heating their homes with an open indoor fire and keeping out the cold with brightly-woven mats and furs. The houses stayed surprisingly warm during the winter (sometimes getting as hot as 90 degrees F, especially in the wigwams, which were better insulated than the colonists’ dwellings). But tending the fire was a tedious, time-consuming, dirty, and somewhat dangerous task – and as anyone who has ever made breakfast over a campfire will tell you, cooking three meals a day over an open flame was very challenging.

Indoor plumbing is another invention that early natives and settlers could not have imagined (although again, it had been invented long before by the ingenious Romans). During the long and arduous voyage to the New World, European colonists relieved themselves by sitting on shelves that jutted out over the sides of the ship; when they reached the New World, they simply went outdoors to do their business, even in the dead of winter. Even outhouses were luxuries in the early years. Baths were uncommon (sometimes a once-a-year event) and were not taken at all on board ship. When colonists did wash, they did so in a nearby stream or pond.

So, the next time you press a button on your thermostat to turn on the heat, or flush your toilet, or take a nice warm shower, or cook a meal on a temperature-controlled oven – give thanks!

We’re grateful for the opportunity to help you keep your home warm, safe, and comfortable. Our customers are one of the many blessings for which we are thankful – now and all year long.

Happy Thanksgiving to all.

Continue Reading

It’s Easy to Prevent Burst Pipes This Winter

Wednesday, October 20th, 2010

Burst pipes are expensive, destructive, and…preventable.

Most people know that they need to winterize the plumbing in a camp or vacation home to keep it from freezing over the winter and bursting the pipes. But you also need to winterize the plumbing in your primary residence, even if you’re going to stay there all winter.

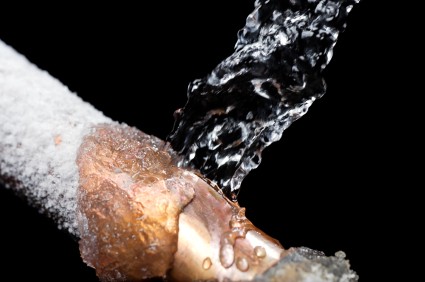
A burst pipe - what you want to avoid this winter

Burst pipes - easier to avoid than you think!

This is really one of those situations where an ounce of prevention is worth a pound of cure – and the prevention is easy.

The right pro-active maintenance will keep your home’s pipes warm and cozy all winter, so that you and your possessions stay comfortable and DRY!

Here’s how you do it:

1. Insulate exposed pipes

Check to see if you have exposed piping in un-insulated spaces such as a crawlspace, attic, outside walls, etc.

If you have exposed piping, you should insulate the pipes. The materials are inexpensive and the task doesn’t require a high level of DIY skill. However, it does require patience and care to ensure that pipes are completely covered.

There are a number of different options for insulating pipes. You can wrap regular fiberglass attic insulation around pipes, but an easier alternative is the foam or fiberglass tubing (also called “tubular sleeve insulation”) that is made specifically for pipes. You should look for insulation with an R-4 rating (most standard 5/8 foam tubes have this rating).

Whatever insulation you use, make sure you begin by removing any dirt or grease from the pipes with a rag and mild cleanser. Allow the pipes to dry thoroughly before wrapping them with insulation. Make sure you cover the pipe completely, taking extra care at corners wherever two sleeves or pieces of insulation meet. Wrap these areas with duct tape to seal them completely.

(Always use duct tape to secure the insulation to your pipes. Other forms of tape, like masking or electrical, will stretch or break over time. You’ll lose the integrity of your seal, and eventually you’ll have to tape the pipes all over again.)

If you have pipes that have frozen in past winters, or pipes in spaces that will fall below zero, you may wish to consider using heating tape. It is a plastic strip with heating elements embedded in it that can be wrapped around pipes and plugged in. Heating tape is easy to install and can be purchased in most hardware stores. While it is effective, it can be expensive to operate and so should only be used when regular insulation is not enough.

Note: When you’re looking for exposed pipes to insulate, focus on pipes where the water comes in, not pipes where the water drains. Drain pipes – except for the traps beneath sinks, tubs, and showers – generally do not hold enough water to cause damage if frozen.

2. Caulk outside pipes

Caulk around pipes where they enter your house from the outside. There are lots of different types of caulk, so check with your plumber or local hardware store to find out which type will be best for your home.

3. Shut off and drain exterior faucets (or insulate them)

First, go down to your basement and locate the shut-off valve for each exterior faucet. Turn the valve so that the water supply is shut off. Then, go outside and turn the faucet on, so that any remaining water drains out of the faucet. (You can leave the faucet in the on position all winter.)

Not all faucets have a separate shut-off valve in the basement. Check with your plumber if you’re unsure.

If you can’t shut off and drain your exterior faucets, you should insulate them. The easiest, most attractive, and most effective way to insulate them is with molded foam insulating covers. These are available at most hardware stores.

And…don’t forget to drain your hoses and bring them inside for the winter! You should also drain and shut down your sprinkler system (follow the manufacturer’s instructions).

Continue Reading