Carney All Seasons Blog: Posts Tagged ‘Plumbing’

Water Heater Tip: Reduce Energy From Your Hot Water Heater

Monday, November 19th, 2012

Are you looking to lower the energy use for the hot water heater in your Blue Bell, PA home? While your water heater may not be an obvious source of energy waste, there are small improvements you can make that will add up over time. Feel free to call the energy experts at Carney Plumbing Heating & Cooling if you have further questions about how to reduce the energy use of your water heater.

Meanwhile, we’ve put together a short list of things you can do to get started today!

Use Less Hot Water

Conserving water in your home is a green practice that the entire family can help with. Once you get into the habit of conserving water, it will be even easier to think about how much hot water you use. Even if you don’t have Energy Star appliances, you can use cold water instead of hot in many instances. For instance, try using cold water to wash clothes. Not only does this save energy by using less fuel to heat the tank in your water heater, but it will also help your clothes last longer. Take shorter showers, or lower the temperature in the shower while you are bathing.

If you own a tankless water heater, consider installing low flow faucets and plumbing fixtures. Tankless models are highly efficient water heaters, but they are even more efficient when used in tandem with low-flow fixtures. Repair dripping hot water faucets and other small leaks. These add up over time, and if you get them repaired as soon as you notice them, the less hot water will be wasted.

Lower the Water Heater Thermostat

While no one wants an ice cold shower, you also don’t need the shower to be scalding hot. Not only is this dangerous, especially for small children, but it is also a waste of energy. You could save up to 5% in water heating costs if you lower your water heater thermostat just ten degrees. Many manufacturers use the default setting of up to 140°F; however, you don’t need to set your water heater thermostat above 120°F to get an adequate temperature for all the hot water applications in the home. Call one of the Blue Bell plumbers at Carney if you aren’t sure where to locate the thermostat or have questions about the proper temperature settings.

Install a Water Heater “Jacket”

If you own a storage tank water heater, make sure that the tank is insulated for maximum energy savings. You can install a water heater “jacket” that fits your specific water heater tank. Call a plumber if you would like to know whether or not your water heater has enough insulation. One of our plumbers can also provide other tips to help you save water and energy.

Start saving water and lowering your energy costs today! Call the Blue Bell plumbers at Carney Plumbing Heating & Cooling for more advice and tips.

Continue Reading

Students Awarded $1000 Dollars Through the Carney Plumbing, Heating & Cooling Plumbing and HVAC Scholarship.

Wednesday, August 22nd, 2012

Lansdale, Pennsylvania -Carney Plumbing, Heating & Cooling has awarded two outstanding students $500 each toward their education in the HVAC and plumbing industries.

Scholarship | Lansdale | Carney Plumbing, Heating & Air ConditioningThe winners are:

Ryan Paradis of Candia, New Hampshire – Ryan is attending Manchester Community College of New Hampshire to get his HVAC Associates Degree.

Ryan remarked about green living in his essay: “My future goals entail starting my own HVAC business based off of green, renewable energy sources for alternate heating and air condition solutions. The idea of harnessing the power of our environment really appeals to me.”

Clayton Foxx of Jonesboro, Georgia – Clayton is studying Air Conditioning Technology at the Atlanta Technical College.

Clayton remarked about starting his own business in his essay: “My long term goals are to eventually open my own Air conditioning business to award others the opportunity to improve the field as well.”

Kevin Carney, owner of Carney Plumbing, Heating & Cooling said, “We were excited to read what motivates students to become leaders in the HVAC and plumbing industries, and how they plan on changing and improving the field.”

Carney Plumbing, Heating & Cooling created this scholarship to help motivate students to become HVAC technicians and plumbers, as well as to encourage students who are already pursuing rewarding careers in these industries. Carney Plumbing, Heating & Cooling is a growing company, so they are always in need of bright, hardworking people.  By making these funds and future scholarships available, Carney Plumbing, Heating & Cooling hopes to motivate students entering the work force to contribute to the HVAC and plumbing industries.  With emerging green technologies in HVAC and plumbing, future students have the opportunity to shape their industry and the homes we live in.  Now more than ever we need the brightest and most ambitious students to step up to the challenging and rewarding careers available in these fields.

Congratulations to the winners!

About Carney Plumbing, Heating & Cooling:

Carney Plumbing, Heating & Cooling was founded in 1976 by Kevin J. Carney and Diane Carney. Although the operations are now in the hands of sons Kevin and Ryan, Kevin – or “Senior” as he’s referred to by co-workers – remains involved in the company. The company is now in its third facility, located at 900 Bethlehem Pike, Line Lexington, PA 18932 on the border of Bucks and Montgomery Counties.

Continue Reading

How to Choose a Water Treatment System

Monday, June 18th, 2012

Choosing a water treatment system in Fort Washington is a process that takes research and education in order to make an informed decision on what is needed and the best system for a given job.  Before diving into the details of the process it is ideal for consumers to educate themselves on the quality of the drinking water which is being supplied to their home or business.  Identifying contaminants which should be removed from the water allows for a necessary base knowledge-base which will help in identifying water treatment systems that treat the specific contaminants which need to be removed.

Water Treatment Technologies

Drinking water treatment systems utilize a number of technologies which are available, each technology focusing on producing a particular result by running water through it.

  • Filtration:  Separates undesirable elements from water by use of a layered absorbent medium such as carbon which keeps larger particles in the water from flowing through the membranes while still letting the water through.
  • Softeners:  Reduces the amount of hardness—calcium and magnesium—in the water, and replaces those ions with sodium or potassium.
  • Ultraviolet Treatment:  The use of ultraviolet light to disinfect water and reduce the amount of microorganisms present in water.
  • Reverse Osmosis:  Removal of large molecules and ions from water by applying higher pressure to one side of the membrane, then pushing the water through the selective membrane, leaving contaminants behind.
  • Distilment:  Boils water and collect the vapor as it condenses, leaving behind heavy metals but allowing some contaminants to remain which easily change to gasses.

Water Treatment Devices

In order to choose a water treatment system which is appropriate for your Fort Washington home’s needs, have a look at the water treatment devices which are currently available on the market.

  • Point-of-Entry System:  The purpose of this whole-house system is to treat a majority of the water which passes into a residence.  Some water softeners are POE systems.
  • Point-Of-Use System:  Water is treated in batches and delivered to a single tap such as an auxiliary faucet mounted next to the kitchen sink.  Within the POU system are a number of options such as the personal water bottle, pour through pitchers, faucet mounts, counter-top manual fills, counter-top connected to sink faucet, plumbed-in to an existing faucet, or plumed-in to a separate tap.

Once you decide what your water treatment requirements are, how extensively you want your water treated, and what contaminants you want to focus on eliminating, it will become quite easy to choose a water treatment system which is right for you. For help choosing the right system, give Carney Plumbing Heating & Cooling a call today!

Continue Reading

Plumbing Tip: What is a Faucet Aerator?

Monday, May 21st, 2012

A tap aerator or faucet aerator is located on the tip of water faucets which are used indoors such as kitchen and bathroom sink faucets.  Their purpose is to spread the water stream into a number of smaller streams, in essence adding air to the water stream.  This saves the amount of water which comes out of the tap at one time while also reducing the amount of backsplash which occurs when the faucet is turned on.

Utilizing faucet aerators in your Doylestown plumbing can be one of the most inexpensive ways to save money on water consumption and save energy.

There are two main types of faucet aerators, some which use metal or plastic screens to separate the water, and some which do not use screens. One advantage to those without screens is that they eliminate problematic clogging which occurs on screen aerators due to sediment buildup.  There are also aerators with off-valves and swivel aerators which allow users to direct flow to wherever the water spray is needed.

There are three main flow-types seen today. The needle method creates a circular pattern of small, single streams of water with no water-flow in the very center.  The aerated method created a tubular flow with air mixed into the water, creating a single stream of bubbly water.  The laminar method has no air mixed in which makes for a single stream of water with no bubbles.

Many aerators are designed as more economical low-flow aerators which optimize the water flow while still providing optimal water-flow performance.  In kitchens these low-flow options decrease flow from 2.2 gallons per minute to 1.5 gpm or 1.0 gpm, saving anywhere from 32% to 54% of water-usage.  On bathroom faucets the water-flow is decreased from 2.2 gpm to 1.0 gpm or even 0.5 gpm saving from 77% to 84% of water usage.  When engineered properly, low-flow or economic aerators can provide increased perceived water pressure while in actuality helping to save water.

When purchasing new faucet aerators, ensure that you find the proper type (male or female) and the proper size (regular or small).  There are dual-thread options for those who do not know whether a male or female aerator is necessary.  Also, look at the tap aerator’s price in conjunction with how much savings it can provide in water usage annually and see how little must be spent on each faucet in order to save hundreds of dollars.

For any help upgrading your Doylestown home’s plumbing, give Carney Plumbing Heating & Cooling a call!

Continue Reading

Call Carney for all of your bathroom remodel needs!

Friday, May 11th, 2012

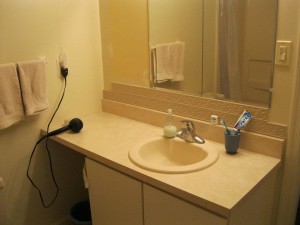
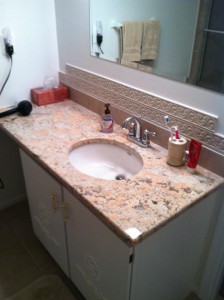
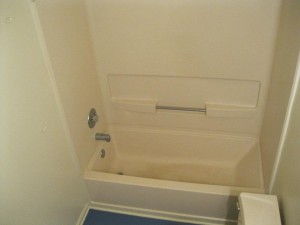
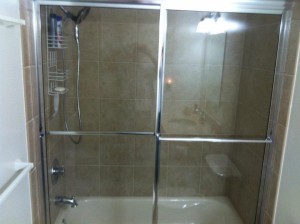
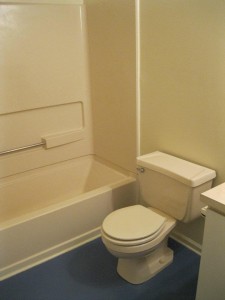
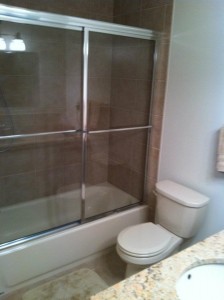
Here at Carney Plumbing, Heating, and Air Conditioning we are experts when it comes to remodeling or adding a new bathroom. We remodeled the existing bathroom below for a customer, check out the before and after pictures!

Remodel | Lansdale | Carney

Before #1

Remodel | Lansdale | Carney

After #1

Remodel | Lansdale | Carney

Before #2

Remodel | Lansdale | Carney

After #2

Remodel | Lansdale | Carney

Before #3

Remodel | Lansdale | Carney

After #3

Continue Reading

Plumbing Basics: Learning the Parts of a Toilet

Monday, May 7th, 2012

The majority of homeowners are not aware that they can repair most minor toilet problems on their own. Whether it’s overflowing or running more than it should, toilets can be repaired often without calling a Willow Grove plumber; however, it is important to know the basic parts of a toilet before trying to troubleshoot toilet issues.

Here’s a guide to learning the parts of a toilet:

Willow Grove Plumbing Tip - Parts of a Toilet

Tank: Pictured above (inspectapedia.com) is the tank on the back of the toilet, which holds the water supply for the bowl and the components that you need to know to fix most problems.

Bowl: Holds wastewater and uses the water from the tank to flush the waste.

Flush Handle:  The flush handle is the part that everyone knows, but it’s important to know what happens when you flush: the flush handle is connected to the trip lever, which lifts the flapper and allows the water for the tank to enter the bowl.

Trip Lever: The trip lever is the part that you need to know for a running toilet. It attaches the flush handle to the flapper, and when you flush the toilet, this lever lifts the flapper (sometimes called a flapper valve) and releases the water from the tank into the bowl to force the wastewater in the bowl down the sewer drain. When a toilet is running, you can simply lift the trip lever to lower the water level in the tank.

Float Ball: The float ball basically measures the water in the tank. After you flush, the ball will fall as the water level lowers, and the ball will rise again as the tank fills from the toilet main water supply. When the tank has enough water, the toilet will stop running.

Overflow Tube: This is the tube that will stop the tank from overflowing if the toilet is running. It leads into the drain and pushes out all the excess water. Sometimes you can remove the rubber water supply tube from the overflow tube to keep a toilet from overflowing if you are not able to shut off the main water valve behind the toilet.

Flapper Valve: This is the part to know whenever you have an overflowing toilet or a backup. The flapper is attached to the flush handle by a chain and the trip lever. Whenever the flapper is pushed down, the water cannot leave the tank, so when you flush, it creates a suction to pressurize the water entering the bowl so that it has enough force to flush the waste. If your toilet is overflowing, push the flapper down with your hand so that it stops the water from entering the bowl. Most people are afraid to put their hands in the tank because they associate the tank water with the water in the bowl. The water in the toilet tank is clean because it comes from the main water supply line, which is attached to the stop valve.

Stop Valve: This is also called the toilet supply valve because it controls the fresh water supply going into the tank. It is usually located behind the toilet near the floor, and turning it off is another way to stop an overflowing toilet because the tank cannot fill once it is turned off.  It is attached to the supply tube, which attaches to the refill tube.

Supply Tube: Although the supply tube and refill tube are connected, they are two different parts. People often use their names interchangeable, but what’s most important to know is that the supply tube supplies the water from the main line and into the refill tube, which refills the bowl.

Refill Tube: When the float ball is down, the refill tube fills the bowl with the water from the supply tube. After a flush, the ball rises, and when it reaches a certain level, the refill tube stops the flow of water into the bowl.

Trap: The trap is a seal that prevents backflow and strong odors from the main sewage line. If you smell sewage in your bathroom, particularly near the toilet, you could have a bad seal or faulty trap. Troubleshooting a trap usually requires a plumber, unless you are familiar with toilet installation.

Wax Ring: Another cause for bad odors is the wax ring, which is a seal between the toilet and the sewage line. A faulty wax ring could also cause leaking at the bottom of the toilet. Call a plumber whenever you aren’t sure about leaking toilets or strong sewer odors; there could be a problem in the main sewer line.

Call Carney Plumbing Heating & Cooling if you have any questions about these components, or if you want to trouble shoot with one of our Willow Grove plumbers.

Continue Reading

Fix Water Leaks Before They Cause Major Damage

Monday, April 30th, 2012

Water leaks are one of the most destructive and frustrating problems in many Lansdale homes. Undetected water leaks can rot wood, destroy drywall, and cause mold to grow in unseen spaces of your home. Spending the time and money to find and fix water leaks before they cause significant damage is one of the most cost-effective actions a homeowner can take.

Sinks

Cabinets beneath kitchen and bathroom sinks are a good place to start. Look for signs of water damage or build up. Mold and mildew are telltale signs of water leaks. Touch the pipes, particularly the areas where they enter the faucet. Run the hot and cold water faucets for a few minutes and repeat the inspection. Finally, fill the sink with water, let it stand a few minutes and open the drain. Now check the drain pipe and the joints that connect it to the sink for leaks.

Dishwashers

Dishwashers can’t easily be checked for leaks without pulling them out from beneath the counter. But you can inspect the water lines that connect the dishwasher to the kitchen sink. For some units, you may be able to shine a flashlight beneath the dishwasher to look for puddles.

Toilets

Toilets can leak from the water supply pipes filling the tank and from the seal between the toilet and the waste pipe in the floor. Flush the toilet several times and carefully look for any signs of leaks in the  joints of the water supply pipe and the floor around the base of the toilet. Lift the lid off the tank and flush the toilet. When the tank refills, the water should completely shut off. If the flush valve or water control unit is old, corroded, or loose, the water will continue to run. Running water cools the water delivery pipe to the toilet and the tank, which will cause them to collect condensation in humid weather. The condensation will drip and eventually cause water damage to the floor behind the toilet. Bottom line – don’t ignore a running toilet. Have the water control and flush valve fixed or replaced.

 Tubs and Showers

Inspect the caulking around the tub or shower. Old, cracked, or missing caulking can allow water to leak into the wall. Water dripping from a leaky faucet or shower head will go down the drain and not cause any damage, but the faucet may also be leaking water behind the tub or shower.

Hot Water Heaters

Finally, inspect the hot water heater for leaks, and the boiler if the house has hot water heating. The first place to look is the floor around the appliance, but also look at the joints where the water pipes connect.

If you need any help with leak detection or any other problems with your Lansdale plumbing, give Carney Plumbing Heating & Cooling a call!

Continue Reading

How and Why to Recaulk Plumbing Fixtures

Wednesday, March 21st, 2012

You probably don’t pay much attention to the caulking around your New Hope plumbing. It is one of those things that is always there, working kind of behind the scenes, that you never seem to notice until something goes wrong.

The think about caulking, though, is that something can go wrong with it rather quickly. Because of the high frequency of use of tubs and sinks, the caulk that seals the space between the fixture and the wall can deteriorate and crack over time. This can cause gaps in the caulk or cause the fixture to come loose from the wall.

When this cracking and erosion happens, water from your bath, shower head or faucet can seep in between the fixture and the wall, potentially causing water damage and fostering colonies of mildew and mold.

Cracked caulk is inevitable with daily use, so you don’t need to worry about preventing it. Instead, learn how to properly fix the situation with a fresh caulk job:

  1. Scrape away all the old caulk from around the fixture using a utility knife or putty knife. Take care to remove all the old caulk while also avoiding scratching porcelain fixtures.
  1. With all the caulk gone, clean out the joint thoroughly. This will remove any last traces of caulk, as well as any other dirt or buildup. If you notice mildew or mold, use a chlorine bleach solution to clean the joint before recaulking.
  1. Once the joint is dry, recaulk it using a bead of caulk that is just slightly wider than the joint. This ensures an adequate seal. Wipe any excess away with a rag.
  1. Allow the caulk to dry thoroughly before using the sink or tub. Read the instructions on the caulk for an estimated drying time.

Take note that it is very important to thoroughly remove all the old caulk and clean everywhere along the fixture joint before applying the new caulk. Otherwise, the new caulk will not adhere properly and potentially damaging dirt may get sealed into the joint.

If you followed all the steps carefully, you should have a fresh seal of caulk that will last you another several years! If you need any help with your plumbing fixtures, give Carney Plumbing Heating & Cooling a call today!

Continue Reading

Plumber Tip: How to Replace a Bathroom Vanity

Monday, December 12th, 2011

Because it looks something like a dresser combined with a kitchen counter, you may think of your Jamison home’s bathroom vanity as being a piece of furniture, and therefore that it is simple to replace. Well, there’s good news and bad news there.

The bad news is that because of the sinks and pipes involved, your vanity is part of your plumbing system, so it’s a little trickier than getting a new sofa.

The good news is that it is still something you can do on your own – or at least with a friend – in a few hours or so. After you have measured the space and purchased the new vanity, here is how you can go about replacing the old one:

  1. Shut off the water supply. This is always the first step when undertaking any sort of plumbing work. Put a bucket beneath the sink to catch any water that drips from the supply lines after you disconnect them.
  2. Using a putty or utility knife, loosen the caulk that is sealing the countertop. Gently remove the countertop.
  3. Detach the vanity from the wall. Most vanity units are screwed in place to the wall, so just spot and remove all the screws.
  4. Mark the studs in preparation for positioning the new vanity. Hint: the old one was already drilled into the studs, if it was done properly.
  5. Put the new vanity in place, making sure it is flush to the wall.
  6. Attach the new vanity to the wall, taking care to screw into the wall studs that you marked in step #4.
  7. Put a bead of caulk along the top of the vanity base to hold the countertop in place. Carefully set in the new countertop.
  8. Reconnect the plumbing that you disconnected as part of step #1.
  9. Put down a thin bead of caulk along the edges of the countertop below the lip. Smooth the caulk in place with a damp rag.

Now your new vanity is all set. Allow the caulk to dry before getting moisture near it, and don’t forget to turn the water supply back on! And if you need any help, talk to your local plumber.

Continue Reading

How to Install a Toilet: A Guide From Ambler

Friday, October 7th, 2011

A toilet is a relatively basic piece of plumbing equipment, but that does not mean that installing it in your Ambler house is easy. This is certainly a job that many people can do on their own, but you should be prepared to devoting the majority of your day to the project. While the installation itself is not terribly complicated, it is quite important that you get it right, so make sure you have all of the necessary materials, equipment and tools before you begin.

The first thing to remember is that you need to install your toilet in an appropriate place relative to the rest of your bathroom plumbing. Especially if you are installing your toilet along a branch drain, make sure that the sink, shower and any other plumbing fixtures are upstream of the spot where you will be installing the toilet.

You will also need to make sure that you install the toilet an appropriate distance from the wall. You need to be able to get around the toilet, and you also want to leave space so that work can be performed on the unit later. Putting your toilet too close to the wall can cause all kinds of complications in the way the unit functions and there is also a possibility of condensation build-up. For all of these reasons, it is important to make sure you are allowing an adequate amount of space on all sides.

The procedure you will have to follow when installing a toilet will be slightly different depending on whether you are installing it in a new spot or simply replacing an existing unit. When replacing an old toilet, you need to remove everything involved in the previous installation. That means taking the old bolts out of the floor and scraping away any residue to ensure that you have a clean and even surface to begin your installation on.

You should also make sure that you are aware of all applicable local codes before you begin your work. Even if you technically install your toilet correctly, you could run into trouble later on if your installation is not actually up to code. It is also important to remember to level all of your fixtures before you complete the installation process and to make sure you use a dielectric or brass fitting when attaching galvanized steel and copper to each other.

Continue Reading